快速开始
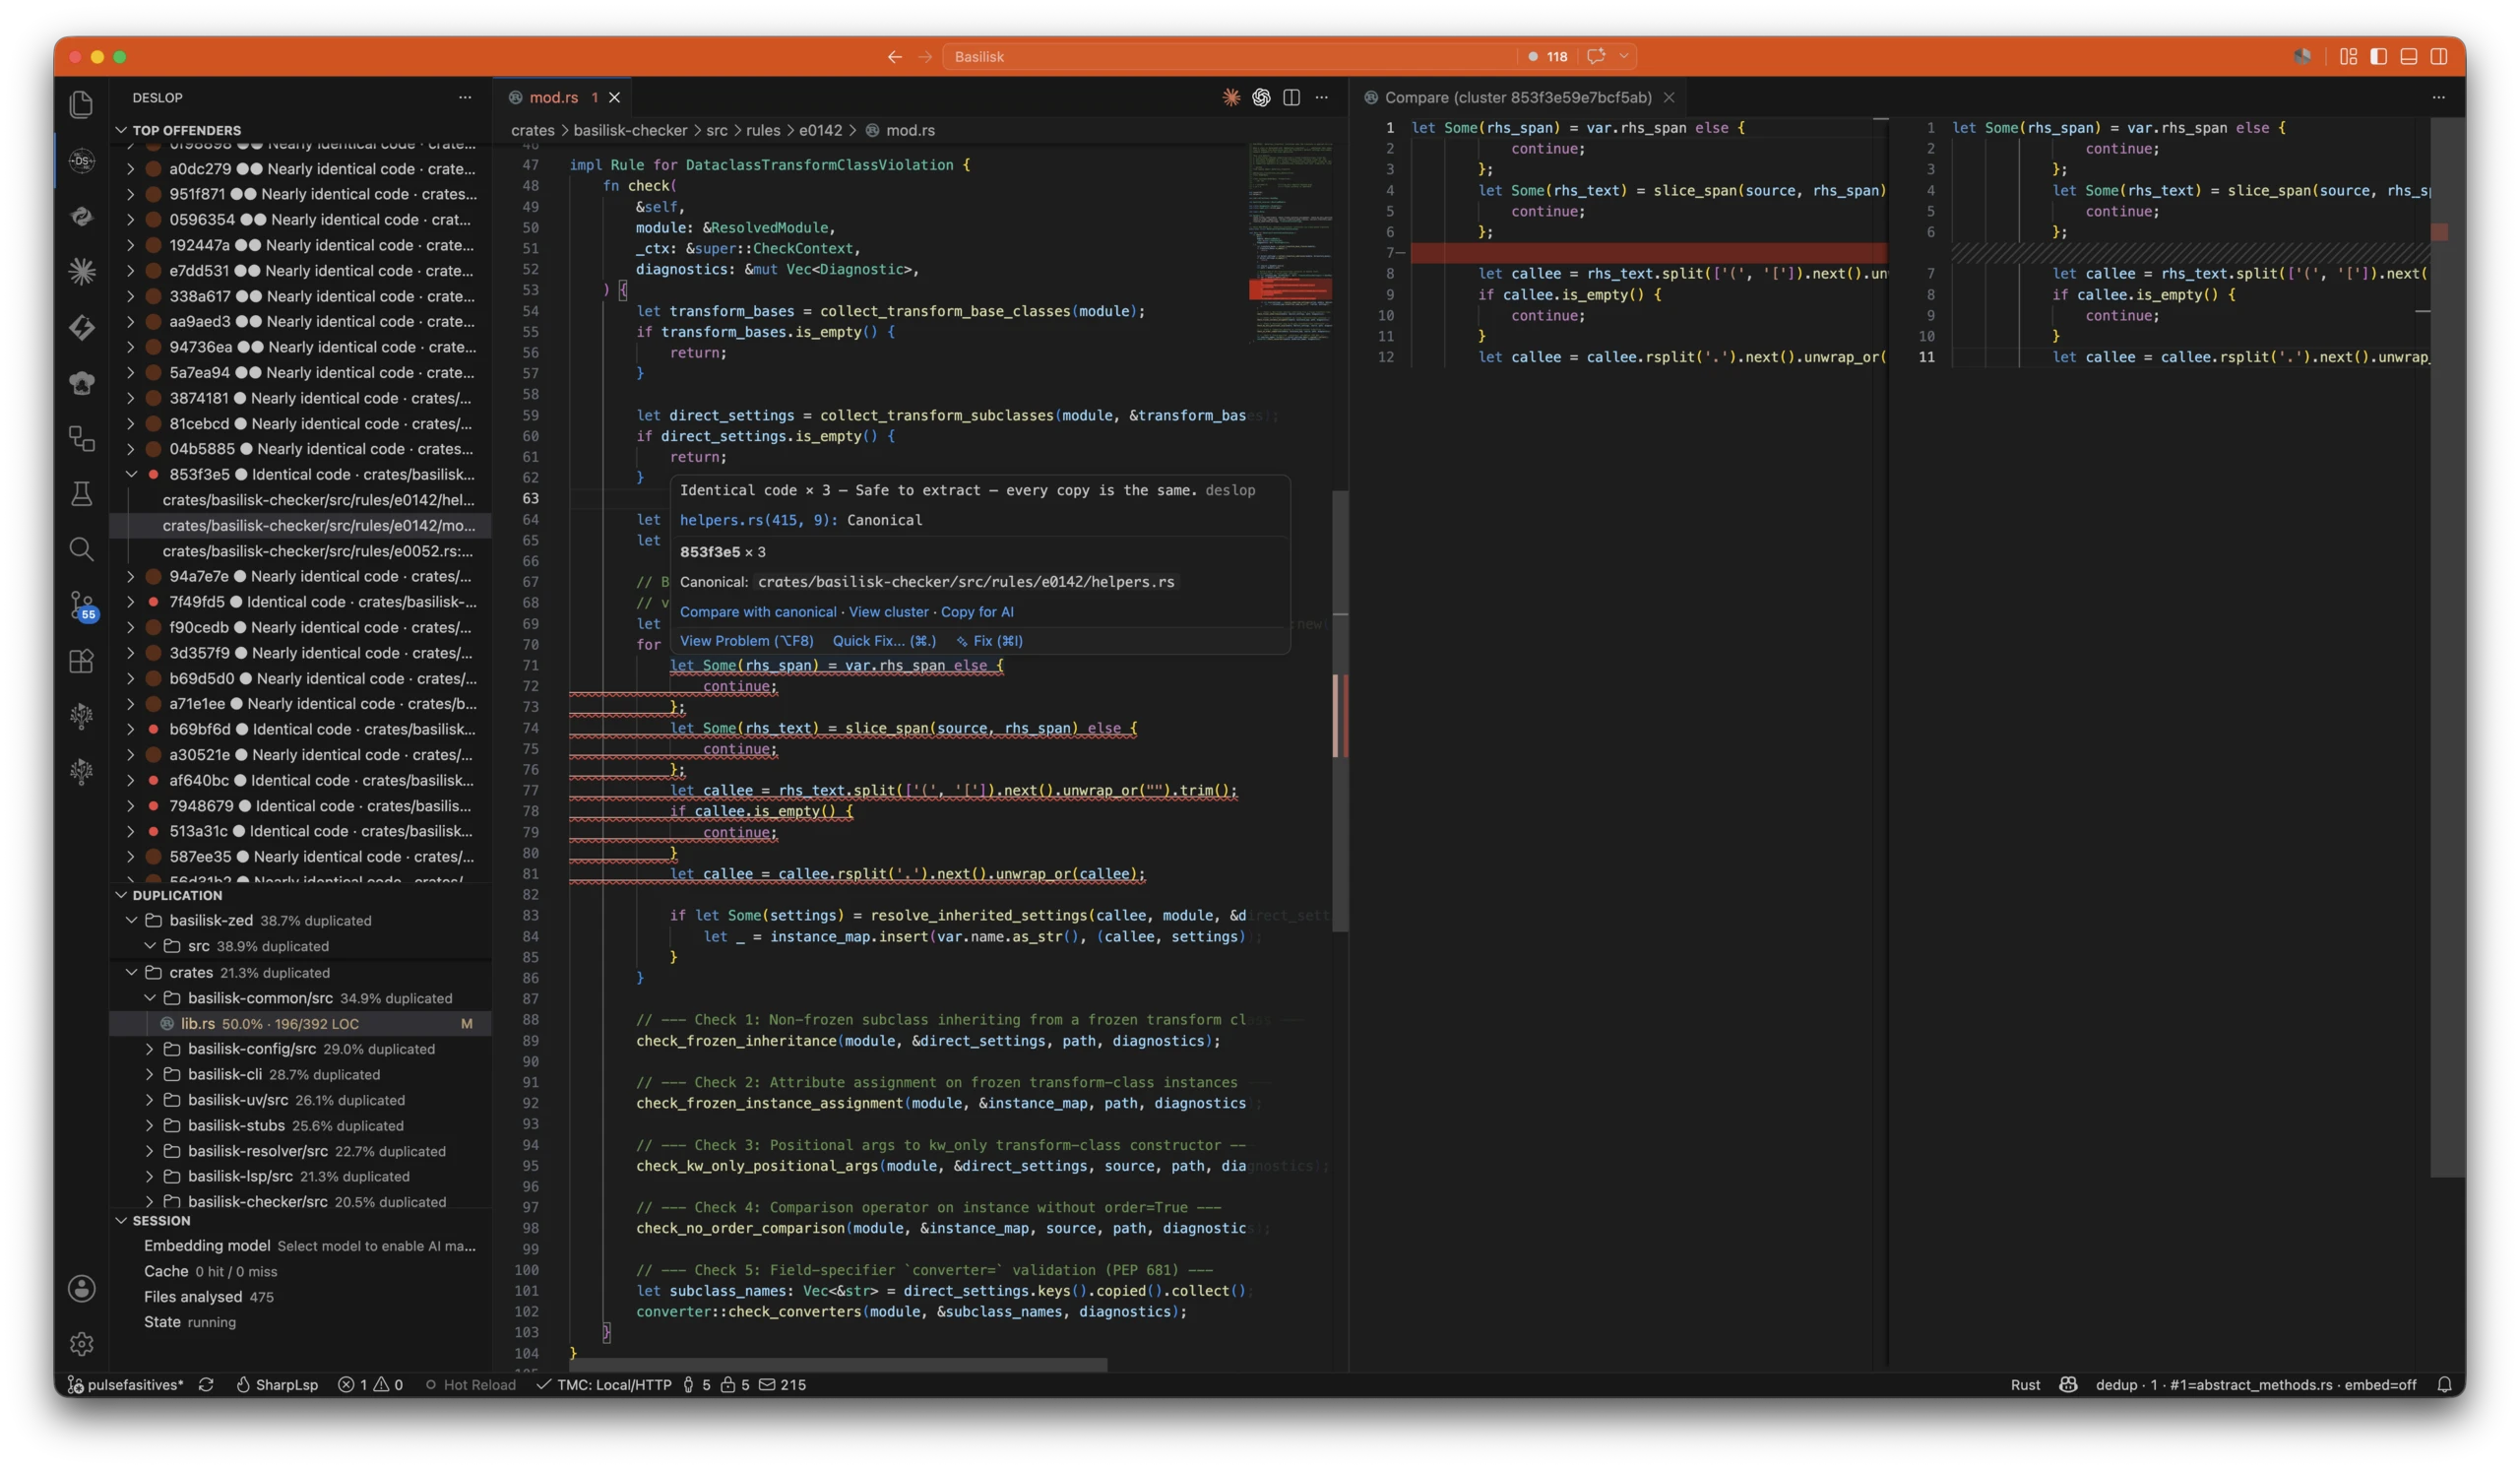
Deslop 在 C、C#、Rust、Python、Dart、JavaScript、TypeScript、PHP、F#、Go 和 Osprey 中查找重复代码,按影响程度排列最值得移除的重复,并在相似代码已经存在时告诉你的编码智能体。 它运行于你的工作区,并随你的输入实时更新 —— Claude Code、Cursor、Copilot、Continue、Codex 以及你的编辑器读取的都是同一份实时分析。
从 VS Code 扩展开始。一次安装即可获得全部三个接口面:实时编辑器警告、智能体写代码前所做的那次检查,以及 CLI。
英文文字稿
Open Deslop in VS Code
I open the Extensions view and find Deslop. This is the extension that adds the duplicate-code panel to VS Code. With it installed, I open this small project so we can review one finding from beginning to end.
Open a finding
The Deslop panel lists the repeated code it found in this project. I click one finding to open its details. The file links tell me where the copies live, so I can go straight to the code instead of searching through folders.
Visit both copies
I open the first file, then the second one. Deslop takes me to the relevant lines in each file. I read the code around the highlighted section too, because two similar pieces of code may still be used in different ways.
Compare before editing
I use Compare to put the two copies side by side. Now I can see what stayed the same and what changed. This gives me a useful starting point for a cleanup, while I still decide which behavior the project needs.
安装 VS Code 扩展
从 VS Code Marketplace 安装:
- 在 VS Code 中: 打开扩展(
⇧⌘X/Ctrl+Shift+X),搜索 Deslop,点击安装。 - 命令行:
code --install-extension nimblesite.deslop-live - 浏览器: 打开 Deslop.live Marketplace 页面 并点击安装。
随后打开一个受支持的源文件(.cs、.rs、.py、.dart、.js、.mjs、.cjs、.jsx、.ts、.tsx、.php、.fs、.fsx、.go、.c、.h 或 .osp)。实时气泡会立即生效,并且随着文件监视器触发,Top Offenders 树状视图会随之填充。
该扩展捆绑了面向 darwin-arm64、darwin-x64、linux-x64、linux-arm64 和 win32-x64 的原生二进制文件 —— 系统会自动为你选择正确的那一个。
离线或隔离网络环境? 从发布页或最新的 GitHub release 获取
.vsix,并通过**扩展面板 →…菜单 → 从 VSIX 安装…**进行安装。
仅安装 CLI(Homebrew / Scoop / curl)
macOS / Linux(Homebrew)
brew install nimblesite/tap/deslop
deslop --version
Homebrew 配方源:github.com/Nimblesite/homebrew-tap。
Windows(Scoop)
scoop bucket add nimblesite https://github.com/Nimblesite/scoop-bucket
scoop install deslop
deslop --version
Bucket 源:github.com/Nimblesite/scoop-bucket。
macOS / Linux(curl)
没有 Homebrew?运行安装脚本。它会下载适合你平台的最新版本,校验 SHA-256 校验和,然后把 deslop、deslop-lsp 和 deslop-mcp 安装到 /usr/local/bin(会要求 sudo)。下载或校验失败时不会安装任何东西。
curl -fsSL https://raw.githubusercontent.com/Nimblesite/Deslop/main/install.sh | bash不想用 sudo?先运行 export DESLOP_INSTALL_DIR=~/.local/bin,并确保该目录在 PATH 中。要安装指定版本,先运行 export DESLOP_TAG=vX.Y.Z。
直接下载
从发布页或最新的 GitHub release 获取对应平台的归档文件,并将二进制文件放入你的 PATH。
运行 CLI
deslop .这会扫描当前目录、写入三份报告,并将最严重的簇打印到你的终端。Deslop 写出的所有内容都会放进被扫描项目根目录下的同一个 .deslop/ 目录——把 .deslop/ 加入你的 .gitignore 即可:
.deslop/
  deslop-report.json   # 权威格式,供智能体读取
  deslop-report.txt    # 按行组织的纯文本
  deslop-report.html   # 独立文件,供人阅读
  logs/                # 按时间戳命名的运行日志
  cache/               # 指纹与嵌入缓存;可安全删除
使用 --output <prefix> 可以把报告(及其日志)改写到别处。
调整阈值
默认的最小 AST 节点数量经过精心选择,以避免琐碎的 getter 污染报告顶部。可按运行逐次覆盖:
deslop . --min-nodes 20对于只想关注重大重复的大型代码库,可以调高它。在追查微观模式时,则调低它。
启用语义检测 —— 行为相同、代码不同(Type-4)
结构与词元通道是确定性的,无需联网即可运行。行为相同的匹配(Type-4) —— 行为相同、语法不同 —— 需要嵌入(向量嵌入)。嵌入默认关闭:
deslop . --embeddings autoauto 会探测本地 Ollama 提供方,若无法连通则发出警告并回退。使用 --embeddings required 可在无法联系到提供方时直接硬性失败。默认模型为 nomic-embed-text;任何 Ollama 嵌入模型均可通过 --embedding-model 选择。
参见 工作原理 了解信号融合的数学原理。
排除噪声
生成的代码与构建产物默认会被过滤。仅为项目特定的依赖、迁移或训练集代码添加 .deslop.toml:
[defaults]
exclude = [
  "**/bin/**",
  "**/obj/**",
  "**/node_modules/**",
  "**/target/**",
  "**/*.Designer.cs",
]

report_hide = [
  "**/*.g.cs",
]
exclude 完全跳过解析。report_hide 会解析但从最终排名中省略 —— 对于你仍希望保留在缓存中的训练集代码很有用。
以重复阈值对 CI 设置门禁
默认情况下,无论发现多少重复,deslop 都会以 0 退出 —— 它只报告,不评判,因此绝不会破坏一个你并未要求它把关的构建。一旦选择启用门禁,当全仓库范围的重复超过你的上限时,它会以 3 退出(使构建失败)。可以传入一个标志用于一次性运行,或将上限提交入库,让本地运行、CI 与智能体共享同一个数值:
deslop . --fail-over 5.0 # 已分析 LOC 中的重复超过 5% 时以 3 退出# .deslop.toml
[threshold]
max_duplication_percent = 5.0--fail-over 会覆盖配置键;--fail-over 0 在任何重复时都会失败;--no-fail-over 会为单次本地运行清除门禁。完整的退出码对照表在配置参考中,而 GitHub Action 为 CI 封装了同一套门禁。